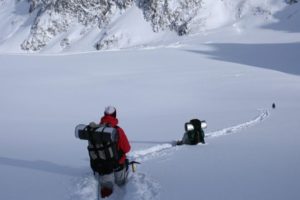
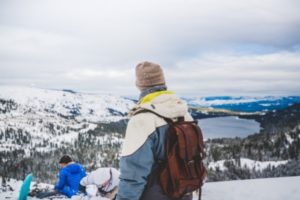
Whether you own the perfect pair of boots or are trying to break-in a new pair of walking boots, blisters are a fact of life. If you walk for a long time, at some point, you’ll end up with a blister or at the very least, have to control part of your foot to stop a blister forming.
In this blog post, we’re looking at how to prevent blisters, and if you get a blister, what you should be doing to it, to stop it ruining your next mountain hike.
What Causes Blisters
A range of different scenarios causes blisters, however, some form of friction between your boots and your feet is generally the culprit. Once the skin starts to become irritated, fluid builds up underneath the upper layer of skin, and your blister is formed. The size of the blister depends on what happens after you first detect that blister. If you keep walking, keep irritating the skin, the blister will keep getting bigger, more painful and with more fluid build-up.
In many instances, blisters are caused by poorly fitted walking boots that are too tight or too loose, causing the skin to rub against the boot. Excessive moisture or sweat can also trigger these skin bubbles. While blisters may be uncomfortable and unsightly, they are a natural bodily response that prevents deeper skin tissues from suffering damage.
Numbness
Numbness is caused when the user has bought boots are too broad and don’t fit well. Rather than your feet fitting snugly into the boot, there is too much space inside the boot. This causes the user to compensate by over-tightening the laces. What happens next is that the leather will fold rather than being compressed. Its this folding of the leather that causes pressure points and in turn, numbness.
To stop this type of blister, you need to either buy a new pair of slightly narrower boots that have a better fit to your feet, or you can look at buying felt pads which can be glued to the tongue of your boot and help to create a better fit.
The Toes
The toes are always a problem with new walking boots. The problem is that the sole starts to loosen up and flex much fast than the stiff leather uppers. This causes the upper leather to crease and cut into your toes. The added friction is guaranteed to cause blisters.
The best way to stop this is to make sure you break your boots slowly over time before you wear them on a significant outing. The break-in process should start with a short trip around town and short walks in the countryside, before proceeding onward. I would highly recommend that you wear a new pair of boots, at least twenty times before you can say they are properly broken in.
The Soles
The soles are usually the last place to develop blisters, however, when your foot sole develops a blister, you’re in serious trouble as they’re often the most painful. Blisters tend to develop on the balls of your feet due to the pressure of walking on hard surfaces with insufficient boot insole padding.
To solve this problem, make sure you replace the standard insole of your walking boots, which are usually very limited and replace with a proper long-distance walking insole. This will provide you with all the padding you need to keep your foot soles intact and pain-free.
The Heel
If you’ve got a heel blister, it usually means the heel cup is too wide for your feet. This means that every time to take a step, there is movement between your heel and the boot. This movement is guaranteed to cause blisters over time.
To solve this problem, firstly look at your socks and make sure you’re wearing a pair of hiking specific socks with extra padding in the right place. If you’ve tried socks, you can look at trying to pad out both your inner sole, but also the heel area. Sadly, the heel is one area that cannot be fixed, as it’s really down the design of the boot as to whether your feet will fit.
The Sock
If it’s not the hiking boot that is causing problems, the sock is the next area of focus. The most important thing to remember is to avoid wearing cotton socks. The problem with cotton is they’re both slow drying and absorb water. The last thing you want is excess moisture between your feet and your boot as this is guaranteed to cause blisters.
The solution is either wear synthetic or merino wool socks that are quick-drying and will make sure any excess moisture is extracted from your feet. You also need to make sure your socks don’t have coarse weaves or are too tight/too loose overall fit.
How To Prevent Blisters – Hotspots
The first step to blister prevention is buying the right hiking boots, socks and tying your laces properly. The second step is to make sure you’re prepared and know what to do if you do get a blister. Too often, what starts as a simple skin-rub, turns into a significant, very painful blister, simply because the person has no idea what to do with it.
Before you get a blister, your going to get a hotspot where the skin has started to rub and get annoyed. It’s the first warning sign that things are not quite right and often the final chance to stop the skin blistering.
Too often over the last few years, I’ve spoken to people who have felt this, ignored it and a few hours later, have excruciating blisters that will cause significant problems for the rest of their trip. If they had stopped and treated the hotspot, they could have easily controlled the problem.
Once you realise you’ve got a hotspot, you need to stop and treat the area. Your focus of any early-stage treatment needs to be creating a protective and durable layer of “skin” in between the foot and your shoe.
The easiest way to do this is either with a piece of moleskin or sports tape around the area, however, make sure you clean and dry the area properly before you start.
Blister First Aid Kit
If your hotspot prevention does not work or you had no blister warning and now have a blister on your foot, you need to take action to stop it getting worse. Below we’ve listed out a step-by-step guide to treating the blister, but the first step is making sure you have the right kit ready on the go.
Blisters are an everyday fact of hiking so make sure you’re prepared with a blister cure kit in your rucksack consisting of the following;
- Alcohol wipes to clean the area quickly
- Tweezers, a small pair of scissors and a small needle
- Powder to dry the area
- Antibiotic ointment like Neosporin
- Spenco Blister Pads or moleskin
- Pieces of pre-cut adhesive tape, Leukotape, or even duct tape in a jam will work
- Waterproof bandages can provide added protection on top of your pad & tape
You Have A Blister – Now What?
At the first sign of pain, make sure you stop and investigate. If you do have a blister and ignore it, you can easily make the whole situation much worse, very quickly. The first step, once you’ve taken your boot off, is to clean both your hands and the blistered area around your foot. The last thing we need right now is the whole area getting infected.
Whether you have a major or a minor blister, I would highly recommend that you drain the fluid from the blister, but leave the skin over the broken blister to act as a protective cover. Once you’re sure you’ve removed the fluid, the next step is to apply an ointment such as petroleum jelly or an antibiotic cream like Neosporin to the blister and cover it with a nonstick gauze bandage or Spenco blister pads.
Other than checking on the blister at the end of each day, don’t fiddle with, touch it or play with it. You need to leave it alone and let it start healing on its own.
Finally
Generally, a blister is not going to repair while you’re still hiking, however, this is not something to worry about. Once you stop and start to rest at home, new skin will grow, and your body will reabsorb any remaining fluid. After a few days, your blister should dry an flake off as the new skin grows underneath.
It’s not required to see your doctor unless it gets severely infected and fills with yellow or green pus. In this case, make sure you contact your local doctor as you may require a dose of antibiotics to help clear up the infection.